

Since the advent of the game CryptoKitties and, more recently, when the founder of Twitter auctioned its first tweet as an NFT for approximately $3 million, NFTs have grown in popularity.
We’ll go over how to start your NFT collection in this post, complete with “digital pieces of art” as tokens. We will do this by utilizing the ERC-721 standard and the Ethereum blockchain. The “pieces of art” (pictures) will be kept in IPFS, and as we adhere to ERC721 JSON Schema metadata requirements, the NFT will also be accessible in OpenSea.
What Exactly Is An NFT?
A Non-Fungible Token, also known as an NFT, is a distinct digital asset whose validity is guaranteed by the blockchain. This kind of token is a fantastic tool to be utilized in platforms or businesses that provide a variety of items where they must demonstrate special qualities and traits like:
Collectibles
Art
Game items
Virtual worlds
Documentation and real-world assets
The ERC721 standard: what is it?
The ERC-721 is a Non-Fungible Token Standard that defines an API for tokens within Smart Contracts. It was first suggested by William Entriken, Dieter Shirley, Jacob Evans, and Nastassia Sachs in January 2018.
It offers features including the ability to move non-fungible tokens between accounts, determine an account’s current token balance, identify the owner of a particular token, and determine the total number of tokens that are now in circulation on the network.
permits optional metadata implementation for your tokens as well.
Pre-requisites:
Node JS & npm — https://nodejs.org/es/download/
Truffle — https://www.trufflesuite.com/truffle
Pinata account — https://www.pinata.cloud/
IDE
Metamask Chrome extension & wallet- https://metamask.io/download.html
Metadata
The metadata storage problem can be solved in a variety of ways. For this article, I’ve opted to host the metadata off-chain (i.e., away from the blockchain), but I’ll do it in a decentralized manner utilizing IPFS to access the metadata.
It may be centralized, and in that case, we’d gain in several ways, including a quicker reaction or more control over the project. or directly on-chain, where deployment costs are greatly increased by the present restrictions on fees and gas prices.
Reference for the ERC721 JSON Schema:
{
    "title": "Asset Metadata",
    "type": "object",
    "properties": {
        "name": {
            "type": "string",
            "description": "Identifies the asset to which this NFT represents"
        },
        "description": {
            "type": "string",
            "description": "Describes the asset to which this NFT represents"
        },
        "image": {
            "type": "string",
            "description": "A URI pointing to a resource with mime type image/* representing the asset to which this NFT represents. Consider making any images at a width between 320 and 1080 pixels and aspect ratio between 1.91:1 and 4:5 inclusive."
Real example of an NFT metadata:
{
    "description": "Galaxy & stars photos",
    "external_url": "https://www.pexels.com/photo/milky-way-galaxy-during-nighttime-1252890/",
    "image": "https://gateway.pinata.cloud/ipfs/QmZ6iJbUpEfKxUodwx4DgaF9zquvRjJEMXAkH8EJtWPLKm",
    "name": "Starry Night #1",
    "attributes": [
        {
            "trait_type": "Author",
            "value": "Hristo Fidanov"
      },
      {
            "trait_type": "Camera",
            "value": "NIKON D750"
      },
      {
            "trait_type": "Resolution",
            "value": "6016px x 3385 px"
      },
      {
          "display_type": "date",
          "trait_type": "Published",
          "value": 1531951200
      }
]
}
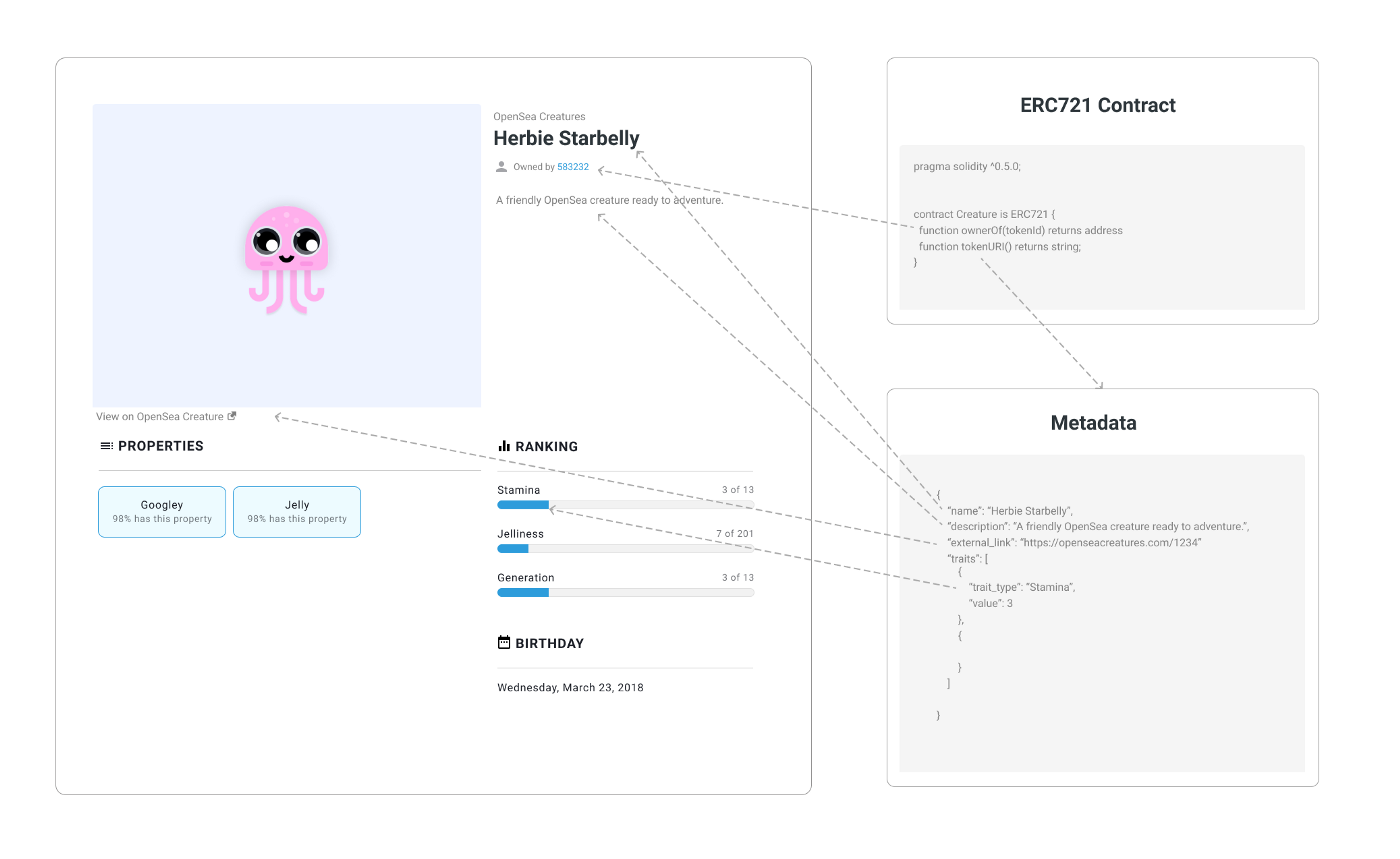
And in the image below, we can see how the outcome would look if we followed the OpenSea conventions:
Upload Metadata To IPFS & Pinata
The first step will be to submit the images that we wish to link to our tokens to Pinata, which will let us keep the images stored immutably and decentralized.
Following that, we’ll see our photograph in ‘My Files.’ Enter the Url to the corresponding metadata text file by clicking on it.
Lastly, we should have a folder similar to the one below with the various files holding our metadata.

Finally, we’ll submit the folder to Pinata.

Additionally, it will provide you with a URL for the contract deployment script, which you will require later.
If you click on it, you should be sent to a folder that looks like this:

Setting Up The Environment
You will need WSL2 to execute every command on Windows OS
Start creating a new project:
mkdir <FOLDER_NAME_PROJECT>
cd <FOLDER_NAME_PROJECT>
npm init -y

Then, install OpenZeppelin Contracts, which provides a variety of Solidity files that we will utilise to implement ERC721:
npm install --save-dev @openzeppelin/contracts
And installing the deployment development framework, which in this example will be Truffle:
npm install truffle
Establishing The Truffle Project
Most Truffle commands must be executed against an existent Truffle project in order to be used. As a result, the first step is to build a Truffle project.
npx truffle init
This program will generate a directory named ‘contracts’ as well as a configuration file (‘truffle-config.js’), which is a Javascript file that may run the necessary code to construct and maintain your truffle environment settings, for example:
Coherence between the compiler used in your scripts and the one chosen in the configuration.
Your project’s network configuration (Development, Rinkeby, Kovan, Göerli, etc.).
We’ll look into this file later.
Smart Contracts And Deployment Files
ERC721 & Extensions
Solidity smart contracts are analogous to the “classes” idea in the OOP model. Contracts include state variables with permanent data and functions that can alter these variables. Calling a function on a separate contract (instance) will result in an EVM function call, switching the context and rendering state variables in the calling contract unavailable.
We will utilize Preset ERC721PresetMinterPauserAutoId, which is an ERC721 that has been pre-configured with the ERC721 standard and its extensions.
Essentially, we are importing numerous Solidity smart contracts with distinct functions into a single file that combines all of them to offer us the majority of the standard’s capability.
We may examine the ERC721PresetMinterPauserId.sol and all of the other Solidity files used for this smart contract by going to the node
path\node_modules\@openzeppelin\contracts\token\ERC721 and/or in OpenZeppelin’s Github.

// SPDX-License-Identifier: MIT
// OpenZeppelin Contracts v4.3.2 (token/ERC721/presets/ERC721PresetMinterPauserAutoId.sol)

pragma solidity ^0.8.0;

import "../ERC721.sol";
import "../extensions/ERC721Enumerable.sol";
import "../extensions/ERC721Burnable.sol";
import "../extensions/ERC721Pausable.sol";
import "../../../access/AccessControlEnumerable.sol";
import "../../../utils/Context.sol";
import "../../../utils/Counters.sol";

/**
 * @dev {ERC721} token, including:
 *
 *  - ability for holders to burn (destroy) their tokens
 *  - a minter role that allows for token minting (creation)
 *  - a pauser role that allows to stop all token transfers
 *  - token ID and URI autogeneration
 *
 * This contract uses {AccessControl} to lock permissioned functions using the
 * different roles - head to its documentation for details.
 *
 * The account that deploys the contract will be granted the minter and pauser
 * roles, as well as the default admin role, which will let it grant both minter
 * and pauser roles to other accounts.
 */
contract ERC721PresetMinterPauserAutoId is
    Context,
    AccessControlEnumerable,
    ERC721Enumerable,
    ERC721Burnable,
    ERC721Pausable
{
    using Counters for Counters.Counter;

    bytes32 public constant MINTER_ROLE = keccak256("MINTER_ROLE");
    bytes32 public constant PAUSER_ROLE = keccak256("PAUSER_ROLE");

    Counters.Counter private _tokenIdTracker;

    string private _baseTokenURI;

    /**
     * @dev Grants `DEFAULT_ADMIN_ROLE`, `MINTER_ROLE` and `PAUSER_ROLE` to the
     * account that deploys the contract.
     *
     * Token URIs will be autogenerated based on `baseURI` and their token IDs.
     * See {ERC721-tokenURI}.
     */
    constructor(
        string memory name,
        string memory symbol,
        string memory baseTokenURI
    ) ERC721(name, symbol) {
        _baseTokenURI = baseTokenURI;

        _setupRole(DEFAULT_ADMIN_ROLE, _msgSender());

        _setupRole(MINTER_ROLE, _msgSender());
        _setupRole(PAUSER_ROLE, _msgSender());
    }

    function _baseURI() internal view virtual override returns (string memory) {
        return _baseTokenURI;
    }

    /**
     * @dev Creates a new token for `to`. Its token ID will be automatically
     * assigned (and available on the emitted {IERC721-Transfer} event), and the token
     * URI autogenerated based on the base URI passed at construction.
     *
     * See {ERC721-_mint}.
     *
     * Requirements:
     *
     * - the caller must have the `MINTER_ROLE`.
     */
    function mint(address to) public virtual {
        require(hasRole(MINTER_ROLE, _msgSender()), "ERC721PresetMinterPauserAutoId: must have minter role to mint");

        // We cannot just use balanceOf to create the new tokenId because tokens
        // can be burned (destroyed), so we need a separate counter.
        _mint(to, _tokenIdTracker.current());
        _tokenIdTracker.increment();
    }

    /**
     * @dev Pauses all token transfers.
     *
     * See {ERC721Pausable} and {Pausable-_pause}.
     *
     * Requirements:
     *
     * - the caller must have the `PAUSER_ROLE`.
     */
    function pause() public virtual {
        require(hasRole(PAUSER_ROLE, _msgSender()), "ERC721PresetMinterPauserAutoId: must have pauser role to pause");
        _pause();
    }

    /**
     * @dev Unpauses all token transfers.
     *
     * See {ERC721Pausable} and {Pausable-_unpause}.
     *
     * Requirements:
     *
     * - the caller must have the `PAUSER_ROLE`.
     */
    function unpause() public virtual {
        require(hasRole(PAUSER_ROLE, _msgSender()), "ERC721PresetMinterPauserAutoId: must have pauser role to unpause");
        _unpause();
    }

    function _beforeTokenTransfer(
        address from,
        address to,
        uint256 tokenId
    ) internal virtual override(ERC721, ERC721Enumerable, ERC721Pausable) {
        super._beforeTokenTransfer(from, to, tokenId);
    }

    /**
     * @dev See {IERC165-supportsInterface}.
     */
    function supportsInterface(bytes4 interfaceId)
        public
        view
        virtual
        override(AccessControlEnumerable, ERC721, ERC721Enumerable)
        returns (bool)
    {
        return super.supportsInterface(interfaceId);
    }
}
And these features enable us to carry out many transactions linked to NFTs and the ERC721 standard:
Mint. To’mint’ an NFT is to produce a digital version of something and add it to the blockchain.
Burn. This allows you to transfer the token to a ‘black hole’ account with no public access, where you can only check the balance but not the content.
Pause. Allows you to delay NFT transfers, which might be handy if you want to halt the asset’s marketability for whatever reason.
Transfer. The asset has to be transferred and tracked in the blockchain.
Insert Metadata. Provide a token URI. Our token URI will be baseUri + tokenId, which will be added and incremented automatically with each minting.
We simply need to copy the artefacts to the build/contracts directory because the build/contracts directory been compiled:
mkdir -p build/contracts/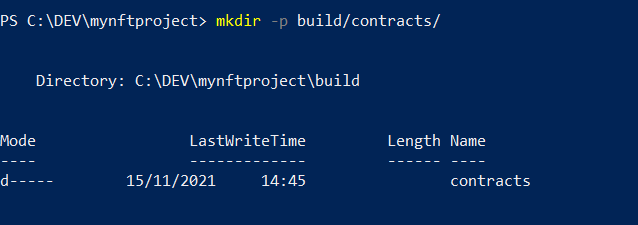
cp node_modules/@openzeppelin/contracts/build/contracts/* build/contracts/Deploy contract script
Using your IDE create 2_deploy_token.js in the migrations directory with the following contents:
// migrations/2_deploy_token.js
// SPDX-License-Identifier: MIT

const ERC721PresetMinterPauserAutoId = artifacts.require("ERC721PresetMinterPauserAutoId");
module.exports = function(deployer) {
  deployer.deploy(ERC721PresetMinterPauserAutoId, "My NFT","NFT", "https://gateway.pinata.cloud/ipfs/QmcdnHCTuPoazQG8ft3tsRQ6RZTob6EDgAR5Mo3LV2Weif/");
};
Here we are setting (in order):
The contract we are using
The name of the collection
Symbol of the NFT
baseTokenURI pointing to the IPFS, which points to our metadata.
Migrations
As stated in the Truffle documentation, migrations are Javascript files that assist you in deploying contracts to the Ethereum network. These files are in charge of staging your deployment activities and are created with the premise that your deployment requirements would evolve.
So, migrations are extremely important when managing the interactions of a larger project and deploying multiple smart contracts that rely on each other at different periods.
You can find this file inside the migrations directory as 1_initial_migrations.js’
const Migrations = artifacts.require("Migrations");

module.exports = function (deployer) {
  deployer.deploy(Migrations);
};

pragma solidity >=0.4.22 <0.9.0;

contract Migrations {
  address public owner = msg.sender;

  // A function with the signature `last_completed_migration()`, returning a uint, is required.
  uint public last_completed_migration;

  modifier restricted() {
    require(
      msg.sender == owner,
      "This function is restricted to the contract's owner"
    );
    _;
  }

  // A function with the signature `setCompleted(uint)` is required.
  function setCompleted(uint completed) public restricted {
    last_completed_migration = completed;
  }
}
Deploy To A Public Testnet (Rinkeby)
An Ethereum testnet is a network that is remarkably similar to the main network, except that the ether has no value and may be gained for free. This makes them particularly helpful for applications such as testing transaction costs.
We will deploy to the Rinkeby public testnet because OpenSea enables testing on Rinkeby.
What are the requirements for deploying on a public testnet?
Obtain a testnet node.
Make a new account.
In our Truffle configuration file, update our network configuration.
Contribute to our testing account
Connect To A Testnet Node
The simplest way to connect to a testnet is using a public node service like Infura.
Create an Infura account, create a new project, and save the ‘ProjectID’ since we’ll need it later.

Set Up A New Tester Account
An Ethereum account is required to send transactions on a testnet. This is included in the Truffle and Mnemonics package:
npx mnemonics
And this will output a series of phrases on your terminal screen that you will need to sign transactions with your account, so save them to write later in the secrets.json file.
In Our Truffle Configuration File, Update Your Network Setup
Because we are utilizing public nodes, we must sign all transactions locally.
We will combine @truffle/hdwallet-provider with our previously prepared list of mnemonic phrases.
We will instruct the provider on connecting to the Rinkeby testnet through the Infura endpoint.
npm install –save-dev @truffle/hdwallet-provider

Following the installation, we will update the truffle-config.js file with a new connection to Rinkeby’s testnet.
This is how it should look:
/**
 * Use this file to configure your truffle project. It's seeded with some
 * common settings for different networks and features like migrations,
 * compilation and testing. Uncomment the ones you need or modify
 * them to suit your project as necessary.
 *
 * More information about configuration can be found at:
 *
 * trufflesuite.com/docs/advanced/configuration
 *
 * To deploy via Infura you'll need a wallet provider (like @truffle/hdwallet-provider)
 * to sign your transactions before they're sent to a remote public node. Infura accounts
 * are available for free at: infura.io/register.
 *
 * You'll also need a mnemonic - the twelve word phrase the wallet uses to generate
 * public/private key pairs. If you're publishing your code to GitHub make sure you load this
 * phrase from a file you've .gitignored so it doesn't accidentally become public.
 *
 */

 const HDWalletProvider = require('@truffle/hdwallet-provider');

 const { projectId, mnemonic } = require('./secrets.json');

 module.exports = {
   /**
    * Networks define how you connect to your ethereum client and let you set the
    * defaults web3 uses to send transactions. If you don't specify one truffle
    * will spin up a development blockchain for you on port 9545 when you
    * run `develop` or `test`. You can ask a truffle command to use a specific
    * network from the command line, e.g
    *
    * $ truffle test --network <network-name>
    */

   networks: {
     // Useful for testing. The `development` name is special - truffle uses it by default
     // if it's defined here and no other network is specified at the command line.
     // You should run a client (like ganache-cli, geth or parity) in a separate terminal
     // tab if you use this network and you must also set the `host`, `port` and `network_id`
     // options below to some value.
     //
     // development: {
     //  host: "127.0.0.1",     // Localhost (default: none)
     //  port: 8545,            // Standard Ethereum port (default: none)
     //  network_id: "*",       // Any network (default: none)
     // },
     // Another network with more advanced options...
     // advanced: {
     // port: 8777,             // Custom port
     // network_id: 1342,       // Custom network
     // gas: 8500000,           // Gas sent with each transaction (default: ~6700000)
     // gasPrice: 20000000000,  // 20 gwei (in wei) (default: 100 gwei)
     // from: <address>,        // Account to send txs from (default: accounts[0])
     // websocket: true        // Enable EventEmitter interface for web3 (default: false)
     // },
     // Useful for deploying to a public network.
     // NB: It's important to wrap the provider as a function.
     // ropsten: {
     // provider: () => new HDWalletProvider(mnemonic, `https://ropsten.infura.io/v3/YOUR-PROJECT-ID`),
     // network_id: 3,       // Ropsten's id
     // gas: 5500000,        // Ropsten has a lower block limit than mainnet
     // confirmations: 2,    // # of confs to wait between deployments. (default: 0)
     // timeoutBlocks: 200,  // # of blocks before a deployment times out  (minimum/default: 50)
     // skipDryRun: true     // Skip dry run before migrations? (default: false for public nets )
     // },
     // Useful for private networks
     // private: {
     // provider: () => new HDWalletProvider(mnemonic, `https://network.io`),
     // network_id: 2111,   // This network is yours, in the cloud.
     // production: true    // Treats this network as if it was a public net. (default: false)
     // }

     rinkeby: {
       provider: () => new HDWalletProvider(mnemonic, `https://rinkeby.infura.io/v3/${projectId}`),
       network_id: 4,       // Rinkeby's id
       gas: 5500000,        // Rinkeby has a lower block limit than mainnet
       confirmations: 2,    // # of confs to wait between deployments. (default: 0)
       timeoutBlocks: 500,  // # of blocks before a deployment times out  (minimum/default: 50)
       skipDryRun: true     // Skip dry run before migrations? (default: false for public nets )
     },


   },

   // Set default mocha options here, use special reporters etc.
   mocha: {
     // timeout: 100000
   },

   // Configure your compilers
   compilers: {
     solc: {
       version: "0.8.9",    // Fetch exact version from solc-bin (default: truffle's version)
       // docker: true,        // Use "0.5.1" you've installed locally with docker (default: false)
       // settings: {          // See the solidity docs for advice about optimization and evmVersion
       //  optimizer: {
       //    enabled: false,
       //    runs: 200
       //  },
       //  evmVersion: "byzantium"
       // }
     }
   },

   // Truffle DB is currently disabled by default; to enable it, change enabled:
   // false to enabled: true. The default storage location can also be
   // overridden by specifying the adapter settings, as shown in the commented code below.
   //
   // NOTE: It is not possible to migrate your contracts to truffle DB and you should
   // make a backup of your artifacts to a safe location before enabling this feature.
   //
   // After you backed up your artifacts you can utilize db by running migrate as follows:
   // $ truffle migrate --reset --compile-all
   //
   // db: {
     // enabled: false,
     // host: "127.0.0.1",
     // adapter: {
     //   name: "sqlite",
     //   settings: {
     //     directory: ".db"
     //   }
     // }
   // }
 };
To avoid hardcoding your mnemonics and projectId, a secrets.json file must be included in the project directory (from Infura). You are free to use any alternative secret-management system you choose as long as it is secure.
In this situation, the file utilized should include the following:
{
"mnemonic": "car photo eye hurricane hawk ...",
"projectId": "505c127050..."
}
Fund Your Testing Account
To get the testing accounts, Truffle is providing you in the project, execute:
npx truffle console --network rinkeby
and then:
npx truffle console --network rinkebyThis command will drop a list of the different accounts you can use:

Choose the first option.
Make a tweet or a Facebook post about it.

Copy the URL of it and submit it to Rinkeby’s Faucet.
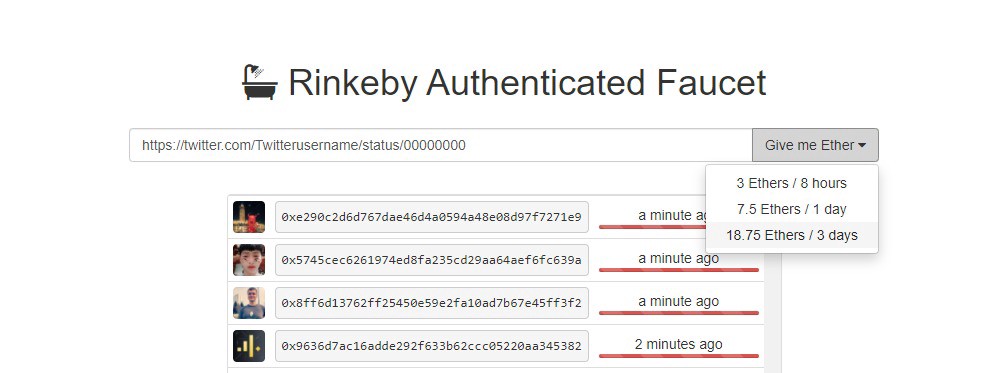
Now, you have your Rinkeby ethers, so you can start spending some rETH!
Deployment:
On your project directory, execute these commands:
npx truffle console --network rinkeby
truffle(rinkeby)> migrate


Now deploy your contract:
mynft = await ERC721PresetMinterPauserAutoId.deployed()
When The Contract Is Completed
If everything went well, you should be able to interact with the contract, so we will mint 1 NFT:
truffle(rinkeby)> await mynft.mint("YOUR_METAMASK_ACCOUNT_ADDRESS")
OpenSea
Now we will list our NFT on OpenSea so that it may be seen and purchased by anybody.
We can use the Truffle console to find the address of our contract on Rinkeby:
truffle(rinkeby)> mynft.addressNavigate to Opensea and choose ‘My Collections,’ followed by the three vertical dots for ‘Import an existing smart contract.’

After choosing ‘Live on testnet’, copy & paste your smart contract address:

You could see the message: ‘We couldn’t find this contract.’ Please check that this is a legitimate ERC721 or ERC1155 contract deployed on Rinkeby and that you have already minted things on the contract.’
This is a regular problem; Opensea will display your tokens, but it may take some time. As long as the token contract and transactions are visible on Etherscan Rinkeby, you know it is a genuine ERC-721 contract with minted X things. You may have to wait 12/24 hours for their NFTs to emerge.
And, assuming no problems arise, we should be able to see our NFT posted on OpenSea in the following structure:
https://rinkeby.opensea.io/assets/[nft contract address]/[token id]
Import It Into Your Metamask Wallet
You should be able to import your NFTs into your Metamask wallet as well. Simply launch the Metamask Chrome extension, enter the address you used for the minting, then click ‘Import Tokens’ from the menu. You will be asked for the contract address, which, once copied, will automatically set the token symbol you supplied before. You must also pick the decimals.


Following steps
There are several options for further developing your NFTs at this point:
One of them may be to research how to deploy on the mainnet and how to estimate the cost.
Another possibility is to include oracles in contracts to carry out confirmed off-chain actions.
Examine how to include all metadata on-chain directly and how the gas and fees function.
An API might be used to offer centralized metadata.
Make interactive NFTs.